
How to Add Custom Fonts in Squarespace 7.1

When you’re customizing your website to match your brand, you may run into a small issue when it comes to fonts. Squarespace has a huge library of beautiful, quality fonts but your signature brand font may not be in it.
So what’s a creative to do?
Add a Custom Font to Squarespace With Coding
After double-checking that your brand font is 100% free (or if you have a license that allows it), you can upload it to Squarespace.
I’ll warn you now: it does take a little bit of coding to add it in. But don’t worry, I’ll show you the exact wording and steps you need to add your font and customize it. You can do this!
I’ll be using my Elevate website design as an example since it has a custom script font that isn’t included in Squarespace. I wanted to have multiple headline fonts to take make this website more unique.
Here’s how I did it…

How To Add Custom Fonts To Squarespace 7.1
1. Find the file for your signature brand font.
This is the perfect time to check the license and make sure you’re allowed to upload it to your site. If it’s a paid font, you may need to purchase an additional web license. You can also search for fonts that are 100% free.
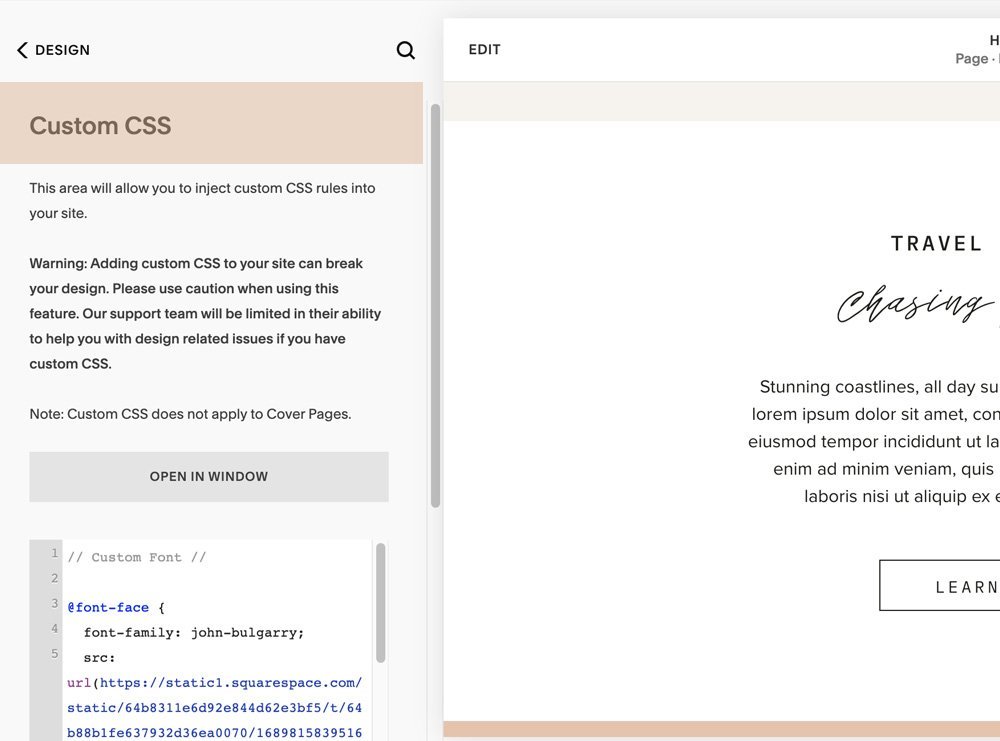
2. Navigate to the Custom CSS Editor.
In Squarespace 7.1, you’ll go to Pages > Website Tools > Custom CSS. If there’s code there already, you’ll just need to scroll to the bottom to add your code below it.
3. Upload the font file just underneath the code box and take note of exactly how it’s spelled. You can even rename the file before uploading to make sure there are no spaces. Just add dashes between words. This will help you input the code a bit easier.

4. Drop in a little code. Here’s the exact code you’ll need to drop in.
// Custom Font //
@font-face {
font-family: font-name;
src: url(link);
}
The titles between the // slashes are simply there to tell you what’s being changed by the code. Now replace ‘font-name’ with the exact name of your font - remember to be careful about that spelling and end with a semi-colon. Now replace the URL link with your custom fonts link. Highlight the word ‘link’ and click on the font file you uploaded. This will insert the link automatically for you.

5. Now you just have to tell Squarespace which headlines you want to use that font for. H1, H2, H3, and H4 are your headline options. I usually like to replace headlines 3 or 4. You’ll add this code below the other one and replace H3 with the headline you want to replace. Again, replace ‘font-name’ with the name of your font and choose a ‘web-safe-font’ in the next step.
h3 { font-family: font-name, web-safe-font;
text-transform: none;
font-weight: 400;
font-style: normal;
letter-spacing: 0em;
Line-height: 1.3
}
6. Choose a web-safe backup font. Not all browsers and devices are going to like your custom font. You can use something common like Georgia or Helvetica as a web-safe font, or there is a big group of them you can choose from if you want something else. You’ll take the name of this font and place it behind the name of your custom font in the above code. You don’t need to upload this one since most platforms already recognize it.
7. Change your custom font settings. You should now see your font appear in the preview window, but it may need some tweaks. You’ll do this by adjusting the CSS styling code above. Here’s what each line of code means and how you can change them…
Text-transform (Should this headline be all uppercase? Lowercase? - Options: uppercase, lowercase, capitalize, none)
Font-weight (Refers to boldness. Regular font is usually 400, Depending on the font you may be able to go as light as 100 or as heavy as 800)
Font-style (Normal or italics)
Letter-spacing (Space between letters. 1em is equal to the size of the font. So if you want a space that’s half of your letter size for example, type in 0.5em.)
Line-height (Space between lines. Heading line height is usually around 1.2 or 1.3, body text is usually 1.4-1.8

You may also want to go into your design settings and resize that headline. Website > Styles > Fonts > Headlines > Headline 3 (or whichever headline you’re replacing)
That’s it!
Wasn’t that easy? It almost makes you want to customize more things with CSS, doesn’t it?
Can I Use Multiple Custom Fonts in Squarespace?
You technically can… but in my experience, using multiple custom fonts for different headlines tends to cause issues. You may find Squarespace reverting back to the original template font or websafe font at times. So I recommend keeping it simple with just one change.
Multiple Headline Styles Using Squarespace Fonts
Let’s say you like the fonts in Squarespace but you want to have more than one headline font. I like the look of contrasting headers and subheaders so this is a common change I make with my designs.
To do this, you’ll use the code from step 5 and simply replace the name with a Squarespace font name instead of adding a custom font. You may have to be a bit of a detective and see how the font’s file name would be displayed in Squarespace. For example, when I test out the ‘Sloop Script’ font as a headline, I can see that it is actually called ‘sloop-script-one’ with dashes. That’s the name we need to add to our CSS coding.

(Advanced Tip: If you’re struggling to find a font name. You can apply it temporarily to your headings, then right-click on a page and select ‘Inspect’ to browse through the coding on a page. You can often find the exact font name there.)
I hope that’s helpful! Let me know what other coding tweaks you’d like to learn!
Love the website design featured in this post? Check out the Elevate Template.


