
How To Make Your Logo Into A Watermark

Designers get paid all the time to make logos into watermarks for photographers and honestly it is so simple! Whenever I get asked to do it, I just want to say, "Don't pay me for this!" It really only takes minutes to do. You don't have to have Lightroom presets or be a master with Photoshop actions in order to have a custom made watermark for your business. Here are two simple ways to create your watermark in Photoshop...
(Note: I am working in Photoshop CS4. If you have Photoshop Elements it may look a little different to you but the principles are the same.)

Step 1// Open your photo and logo in Photoshop. For best results use a black or white version of your logo with a transparent background. The photos I'm using today are by Samantha Clarke who is super talented and the newest photo contributor for Beauty Divine:)

Step 2// Drag your logo onto the photo and place it where you would like the watermark to appear. If your goal is to use the watermark as a way for people to find you, you'll want to put it in an open space, where it's easily readable. If your goal is to keep people from illegally using your image, you'll probably want to place the watermark in an area that might be difficult for someone to Photoshop out like over skin or multiple textures. You can also resize as necessary.

Step 3// Open your Layers Palette (Window>Layers) and select the layer(s) that contains your logo. In the upper right hand corner you'll see the percentage for Opacity. Take the opacity down to make it more transparent. I usually have good luck in the 35% - 70% range. If your logo is on multiple layers like Samantha's, you'll want to select those layers and adjust the opacity on each of them. (You can do this same process on the original logo file as well and just save it as a layered .PSD or .PNG with a transparent background.)
Another way to create a watermark would be to make it into a brush. This method is great for when you want to be able to just click once and be done without opening the logo file every time.

Step 1// Open your logo with a transparent or white background. (Usually designers will give you a .PNG file that contains the logo without a background.)
Step 2// Make your logo Grayscale (Image>Mode> Grayscale).

Step 3// Tune your brightness and contrast until the logo is close to all black (Image>Adjustments>Brightness/Contrast). The brush will use all of the black information, so anything left gray will become transparent. Any white will disappear completely.

Step 4// Create your brush (Edit>Define Brush Preset). If the option is grayed out, you may need to make your logo smaller. Brushes must be smaller than 2500px.
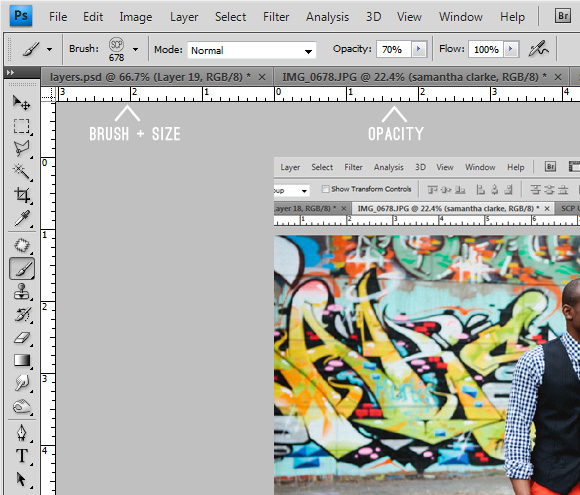
Step 5// Select the Brush tool in your toolbar on the left. In the menu bar at the top of your screen you can choose your new brush (should be the last one), the size, and the opacity. If you make your brush bigger than the original, keep in mind it will become pixelated.
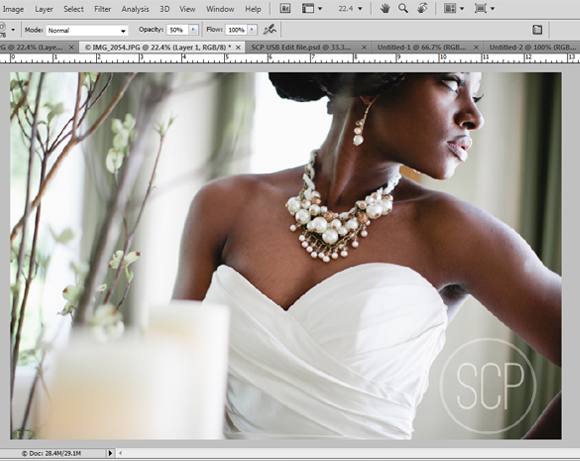
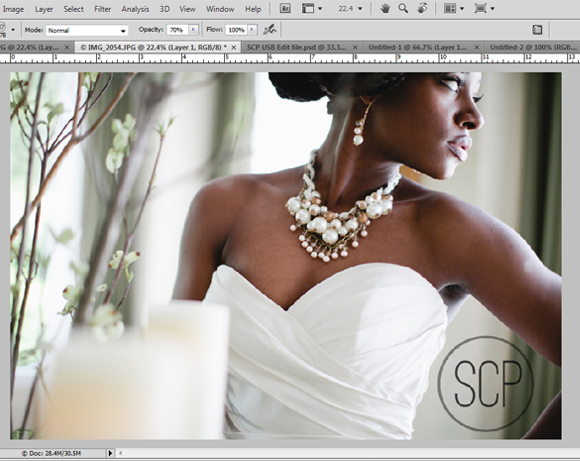
Step 6// Open up a photo and test out your brush. Here's the fun part! Now that your brush is created you can use it over and over again. Simply create a new layer and click. (Be sure create a new layer so that you can make changes to the watermark at anytime before saving.) The above is an example with white and below shows an example in black. You can play around with color, opacity and sizing to decide what works best for your branding.
Flatten your photo by saving it as a .JPG file. That's it! Happy watermarking!